How to update Meta Box meta data using automation
Meta Box is an amazing plugin if it comes to creating custom meta boxes along with custom fields for WordPress.
In this article, we will explain to you how you can use this great plugin to automate the process of updating, creating, and deleting meta data using automation workflows with WP Webhooks.
Why you should update Meta Box fields automatically
Repetitive tasks are a big problem if it comes to focusing on the important parts of your business like growth, stability, or reliability. They are not only time-intense, but come along with other issues such as extra costs, badly used resources, and, of course, human error.
All of this can be avoided by automating those manual tasks using specific automation plugins such as WP Webhooks.
We make sure you get your time back to focus on what’s really important to your business.
How to update Meta Box fields
There are two ways you can use to update custom fields via the Meta Box plugin: Via webhooks or via automation workflows. Both of them are explained below.
Create/update Meta Box data using automation workflows
Time needed: 7 minutes.
Learn how to adjust Meta Box fields using automation workflows with WP Webhooks.
- Install Meta Box and WP Webhooks
Make sure both of the plugins are installed and active.
- Create a new automation Flow
Head over to your WordPress dashboard -> WP Webhooks -> Flows
and create a new Flow with a name of your choice. - Add a trigger of your choice
This will be the event that causes the Meta Box fields to automatically adjust the field data
- Add a new Meta Box action
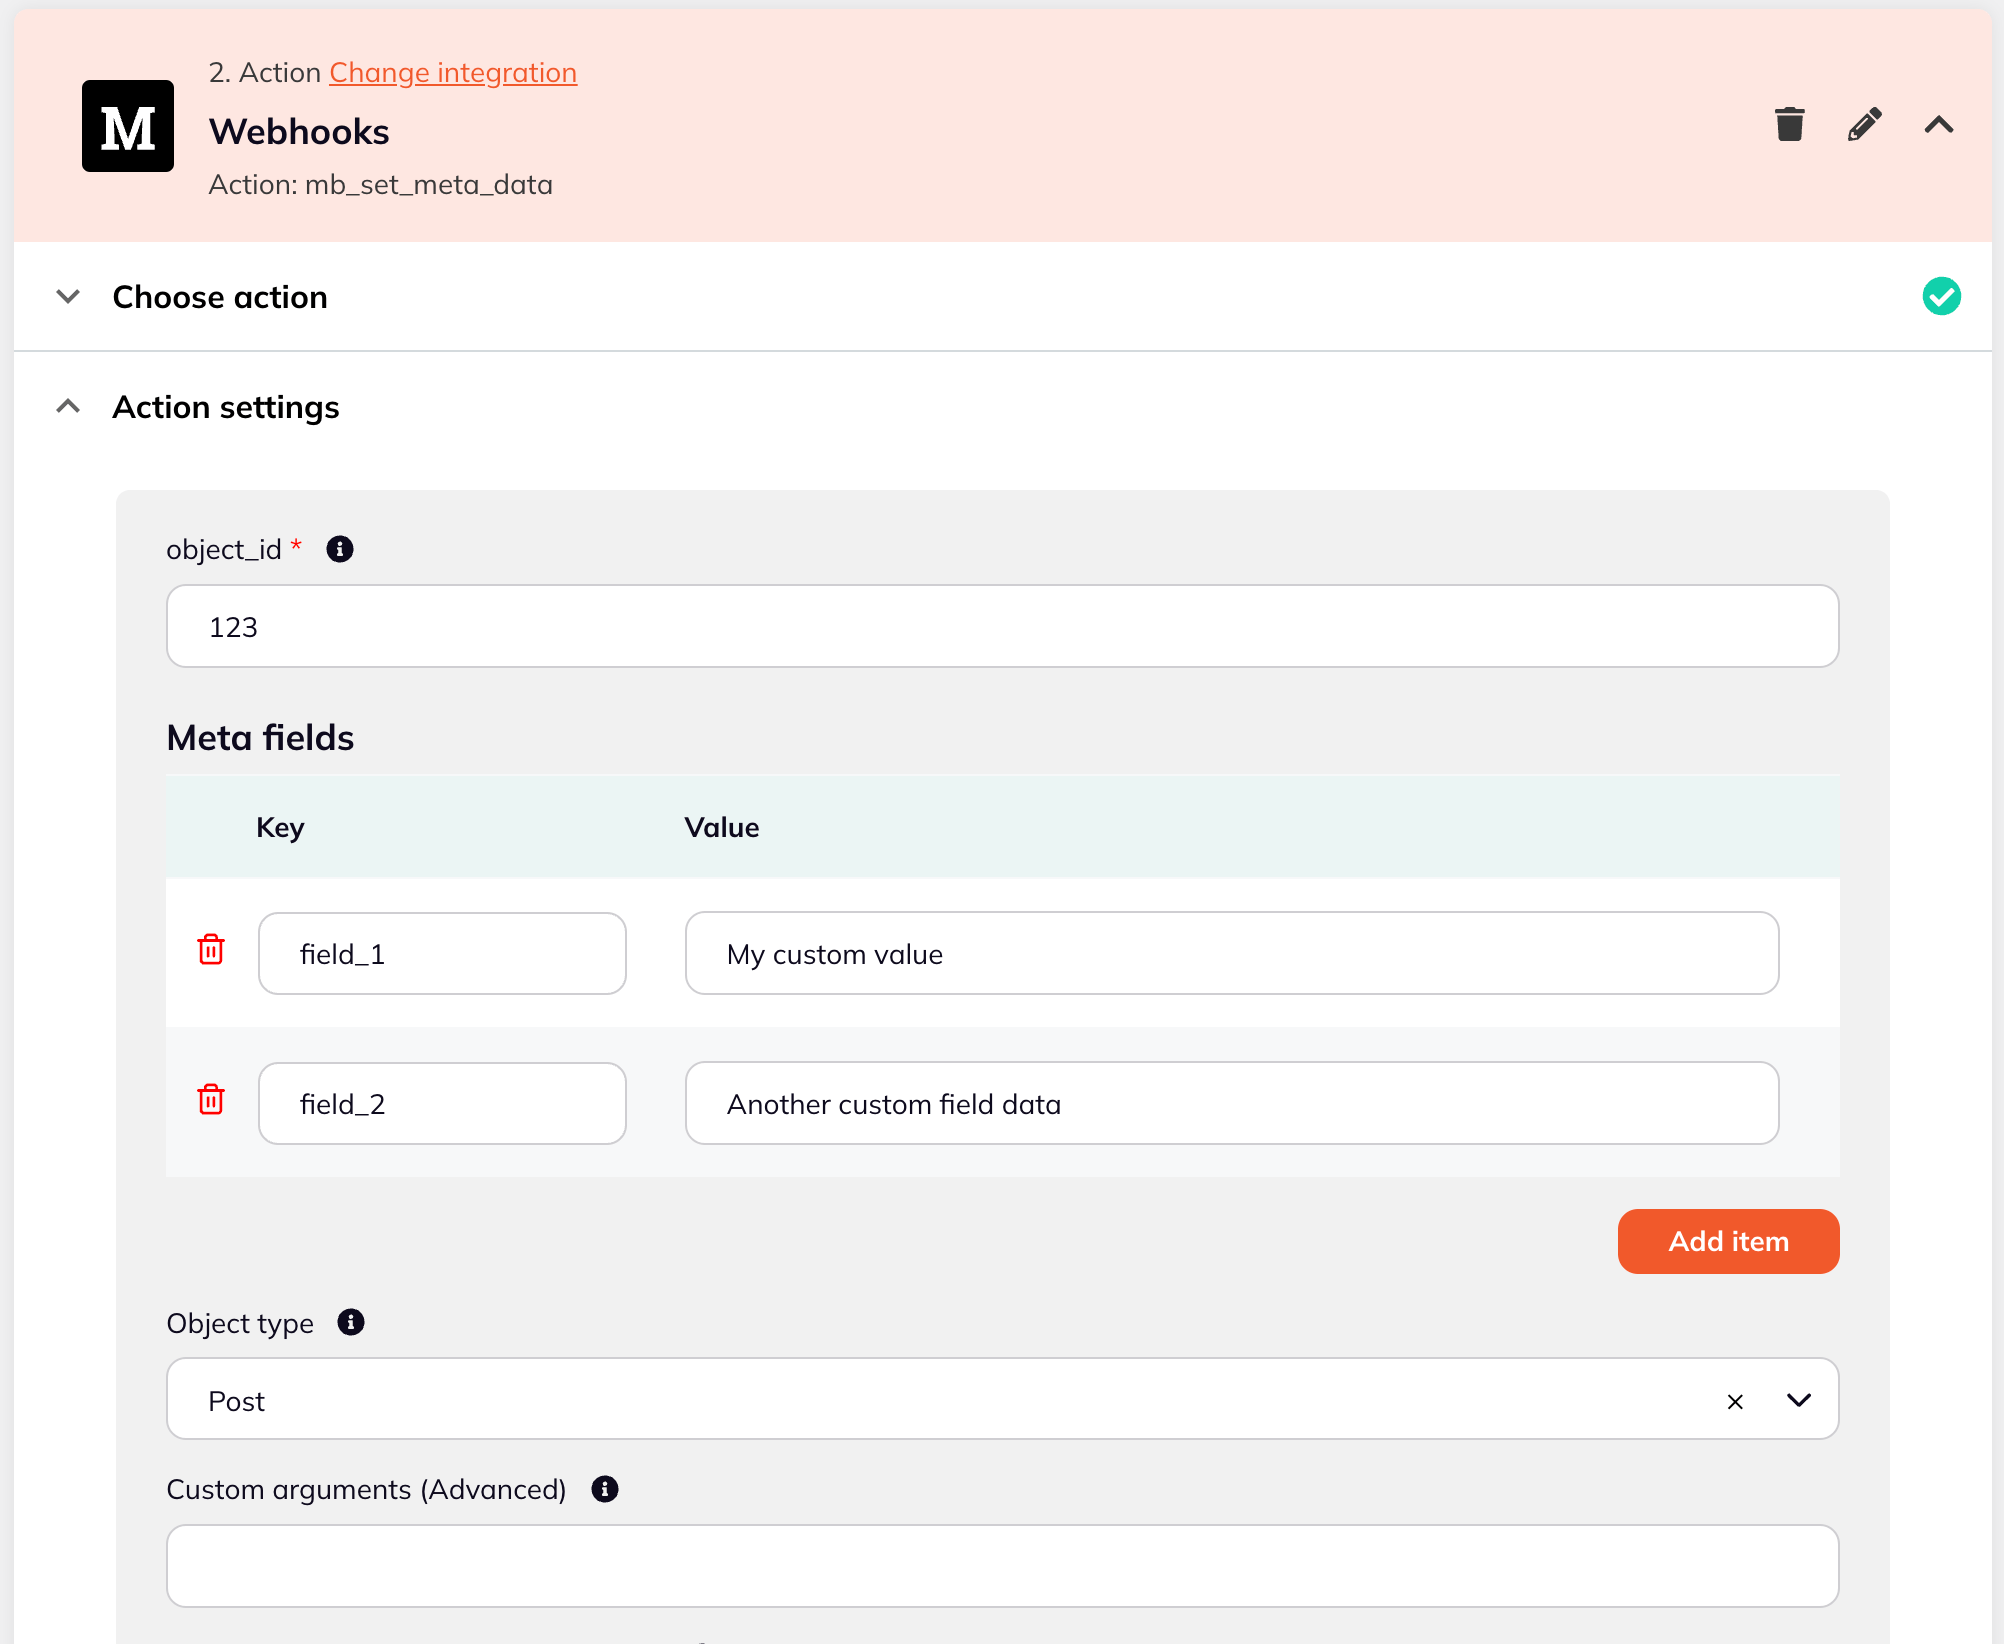
Add an action and choose the “Meta Box” integration along with the “Set meta data” action endpoint
- Set up your meta fields
Add the Meta Box fields you would like to update along with the object type.
- Test and activate Flow
Lastly, test the action and if everything works, set your Flow to active.
Create/update meta box data via webhooks
The alternative to the workflows is the direct webhook integration with WP Webhooks.
For every webhook endpoint, there is an action availalble that allows you to do the same action as within a workflow, just that you can directly address the action via a webhook call instead of setting up automation.
This is specifically interesting if you want to create remote automations and take care of it yourself or for saving that extra execution time of a flow.
To use a webhook action, you can do the following:
- Make sure Meta Box and WP Webhooks are installed and active
- Head over to your WordPress dashboard -> WP Webhooks -> Webhooks -> Receive Data
- Locate the “Set Meta Data” action of the “Meta Box” integration and create a new action URL
- Once the URL is created, you can send data to it based on the argument list
- Within the argument list, you will find further details on what arguments need to be set and what the value you need to send along looks like.
- Lastly, you need to add the URL to the service you want to call the URL from and send the data along.
What fields are supported?
We support all fields supported by Meta Box. The structure of our webhook follows the requirements of the rwmb_set_meta() function of Meta Box. You can read more about it here: https://docs.metabox.io/functions/rwmb-set-meta/
How to set up met values using a custom table
With the Meta Box “Custom Table” integration, you can update meta fields in a separate MqSQL table instead of the default one. We do also support that via the “args” argument of the “Set meta data” action.
To update the values in the correct table, you can add a JSON formatted string along with your custom table name and the storage type definition. Here is an example for that:
{
   "storage_type":"custom_table",
   "table":"custom_metabox_table"
}
This code will update the meta data in your specified table.
Sign up for WP Webhooks news
Get the latest features, tutorials and promotions directly into your inbox.