How to use OpenAI within WordPress (Yoast SEO example)
This blog post explains how to use OpenAI with WordPress and the Yoast SEO plugin as an example to generate an SEO-ready meta description. All of this is possible via the WP Webhooks Automator plugin, which allows you to connect different services without the need for code.
Requirements
To make the automation work, here’s what you need:
- OpenAI: https://openai.com/
- Yoast SEO: https://yoast.com/
- WP Webhooks Automator: https://wp-webhooks.com/
Prepare the setup
Before getting started, please make sure you have the following set up:
- A valid account at openai.com
- Yoast SEO and WP Webhooks installed on your WordPress system
- You must also install the following integrations within WP Webhooks Automator: “Yoast SEO”, “OpenAI”, “WordPress”
Get started
Create a workflow automation within WP Webhooks Automator. You can do that within your WordPress dashboard > WP Webhooks Pro > Automations (Flows). (Set a useful name. E.g.: Create a Yoast meta description via OpenAI)
Add the “Post updated” trigger
Add the trigger along with the “WordPress” integration and the “Post updated” trigger. Once done, continue to the Trigger settings and customize the settings based on your needs. In our example, we select the “Posts” post type within the “Trigger on selected post types” field along with the “Fire only once per instance” setting (This setting is helpful to avoid the firing of multiple requests during the same Instance in case third-party plugins update the post multiple times).

Once set up, continue to the testing step. From there, choose a post based on your liking and update it as you usually update it. This will cause a log to be generated, which you can then select within the testing steps using the “Get logs” item from the dropdown:

Lastly, we want to make sure that the post only fires when the Yoast SEO meta description field is set to “openai” to avoid overwriting any existing description. To do that, we set up conditionals at the end of the trigger.
Please click on the “conditionals step, click on “+ Add” and within the left field, search for “metadesc” and select the “1 > post_meta > _yoast_wpseo_metadesc > 0” variable.
Within the conditional dropdown, select “is” and on the right, add “openai” as a value.
Please note: If you do not see the variable, please ensure that the post you used to test the step has the meta description set.

We have now created a workflow that automatically fires when a WordPress post has been updated and the Yoast meta description is set to openai.
Add the OpenAI “Create completion” action
In the second step, we need to set the OpenAI integration along with the “Create completion” action to automatically generate the meta description based on the post’s title.
Once you’ve added the action, continue to the action settings and save the workflow.
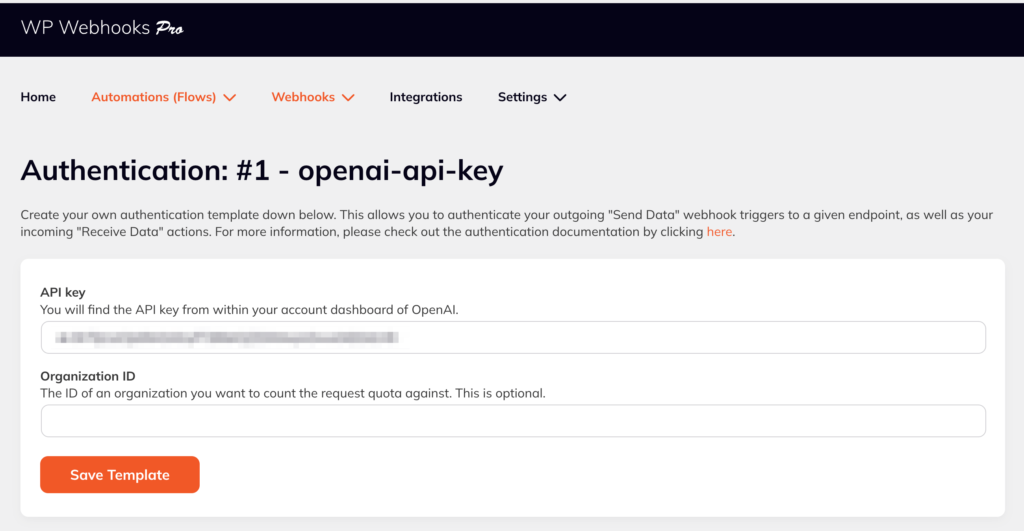
Now head over to the “Automations (Flows)” tab > “Authentications” and create a new authentication template along with the “OpenAPI Credentials” as an authentication type.
After you are prompted to enter your OpenAI API key, which you will find within your OpenAI dashboard:

After you’ve created your API key, please head back to the created authentication template and add it there:
Once added, please head back to your Workflow automation and select the created auth template within the “Action settings” of the added OpenAI action.
Now it’s time to set up the required arguments. Here’s what we have used within our example:
Model:
For the model, we have set the latest model “text-davinci-003”
Prompt:
The prompt contains the instructions for the API to create a response. This is the main ingredient for a successful response of the API. To save you some time, we’ve added the example from the video below:
Write an engaging Open Graph description for Google SEO based on this sentence with a maximum of 140 characters: ADDYOURDYNAMICTITLEHERE

Meta description:
As seen above, we tell the AI to create an SEO description with no more than 140 characters based on a given title. To make sure it works correctly, please add the text to the prompt argument and replace ADDYOURDYNAMICTITLEHERE with the dynamic title from the dropdown with the title variable from the trigger:

Max amount of tokens:
To ensure your meta description gets created accordingly, we set this argument to 500. This means that OpenAI can use up to 500 tokens to create the meta description. To better understand what a token is, check out this manual.
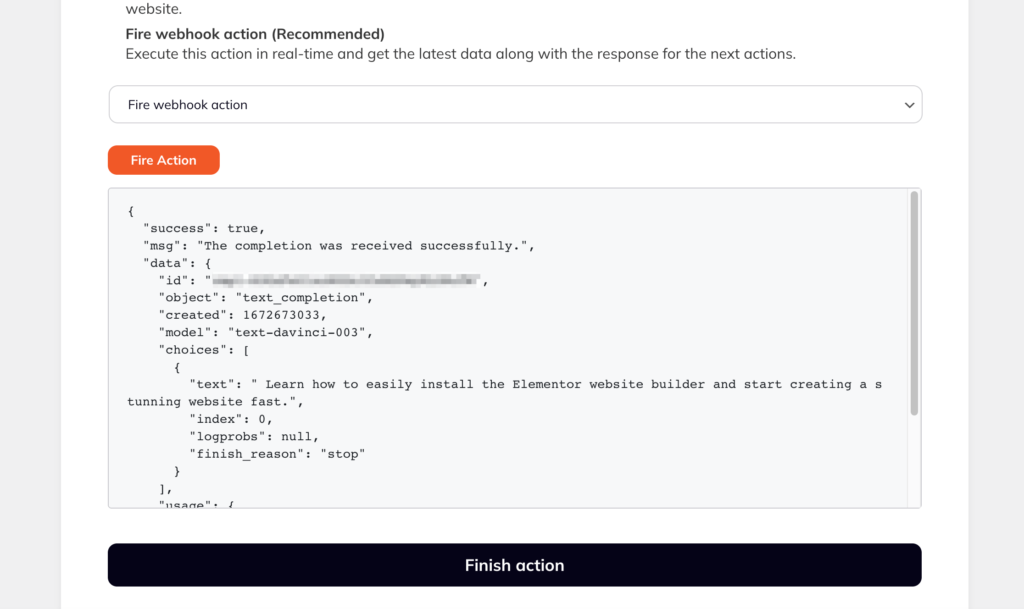
That’s it for the arguments. You can continue the step and test the action using the “Fire action” dropdown item. Once tested, it will return to you an example description based on what we set within the “Prompt” argument:
Save the new description to the Yoast meta data
Lastly, we want to add the generated description within Yoast SEO into the meta description field. To do that, we add the “Yoast SEO” integration and the “Update post SEO data” action.
This allows us to customize various values, such as the title, descriptions, keywords, and more advanced settings.
To make sure we update the fields correctly, here are the arguments we added along with the values:
Post:
For the post, we switched the dropdown of static posts to a text field to use the ID of the currently updated post within it.
Title:
Since the title is required for the update, we simply add it as it is from the trigger data via the dynamic dropdown.
Description:
This is the vital part. Here, we will select the description we received from the response of the OpenAI action using the dynamic variables inside the dropdown.

You can update further arguments based on your liking. For example, you can also extract the main keyword from your title using another OpenAI action along with a prompt like “Extract the main keyword from the following sentence: YOURPOSTTITLE”. Then you can fill this keyword into your main keyword of the Yoast action.
Your possibilities are endless.
As the last step, continue the settings and test the action by choosing the “Fire action” item from the dropdown again.
Once done, everything left is to activate the Workflow in the sidebar, and you are ready to go.
How to test and use it:
Congratulations, you have created a workflow that automatically creates a Yoast SEO meta description based on a given WordPress post title using OpenAI.
To make it work, please head into a post of your choice and add the following to your meta description within the Yoast settings: openai
Once you save the post, it will take a moment until the workflow runs and fires all of the actions. Just give the page a refresh and you will see the meta description being adjusted automatically.
The value openai will be checked within the conditionals to ensure other existing meta descriptions are not overwritten.
Additional details:
In the video, you will find further information on how to use WP Webhooks Automator to automatically trim empty spaces and double quotes from the end of the created string.
That’s it for now. We hope you find this useful and wich you a lot of fun with automating using AI.
Sign up for WP Webhooks news
Get the latest features, tutorials and promotions directly into your inbox.