With version 3.0.0 of WP Webhooks and WP Webhooks Pro, we introduced a feature called Authentication. It allows you to authenticate your outgoing webhook triggers with external API’s.
What it does and how it works
With the authentication feature, you are able to authenticate an outgoing trigger (Within the “Send Data” tab) at the external API point, using one of the following authentication methods:
- API Key Auth
- Bearer Token Auth
- Basic Auth
To make it work, please go to your WordPress Dashboard > Settings > WP Webhooks (Pro) > Settings and activate the setting “Activate Authentication“.
After you saved it, you will see a new tab called “Authentication“
Create a template
To authenticate a webhook trigger, you need to create an authentication template using a template name and the authentication method. After adding it, our plugin tells you to reload the site.
You will then see a new dropdown where you can choose the template from.
Once you selected it, you can configure the settings.
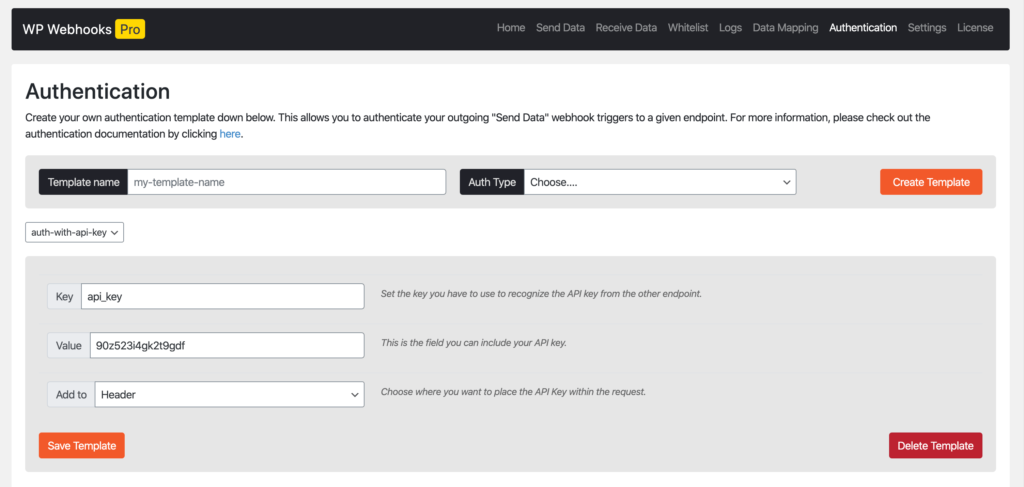
After you saved your credentials, you can head over to the “Send Data” tab and choose the Authentication template within the trigger settings.
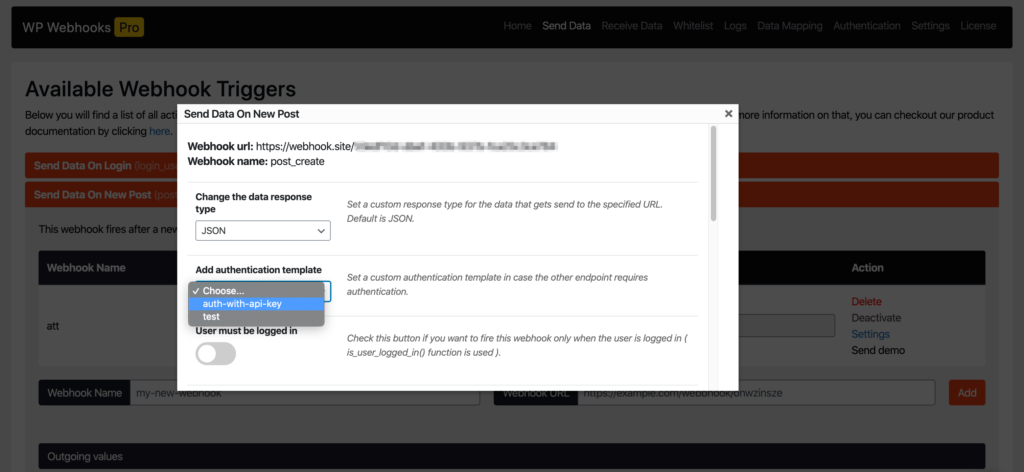
Now you are set up. If your webhook is triggered, it will authenticate at your external endpoint.
This also works for the “Send demo” functionality.