This help file explains to you the basics of how to receive data from Zapier. If you want to learn more about how to send data to Zapier, take a look at this manual.
Receive Data within a Flows automation
If you are using the Flows feature of WP Webhooks, you can simply select the “Zapier” integration from the integration dropdown of the trigger. This will generate a receivable URL, which you can use within the “Webhooks by Zapier” app of Zapier to send data to your WordPress website.
All of the sent data will then be available within the Flow itself.
Receive Data directly on an action URL
You can also receive data from Zapier with a direct connection to one of our actions. This allows you to directly communicate with a specific action of your choice.
The WP Webhooks extension within Zapier
We are offering our own extension within Zapier, which allows you to create optimized connections to our webhook action URLs. You can use the app to connect with any action of your choice.
You will find our Zapier extension via the following link: https://wp-webhooks.com/visit/wp-webhooks-zapier
How to set up a direct webhook action connection with Zapier
Simply create a new Zap, choose a trigger (Which can also be our WP Webhooks extension) and add the WP Webhooks extension as an action (See screenshot).
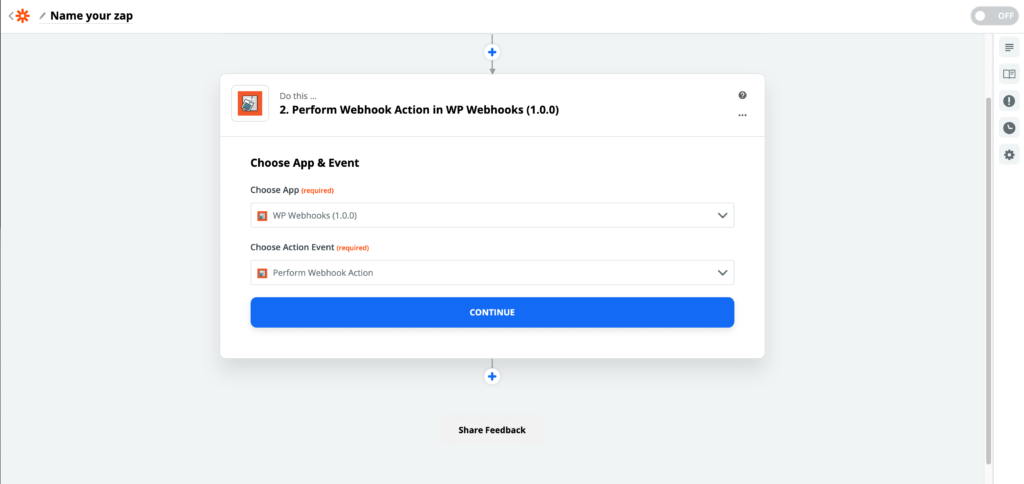
You can also choose an action event. Simply check that Perform Webhook Action is selected.
After, click on continue.
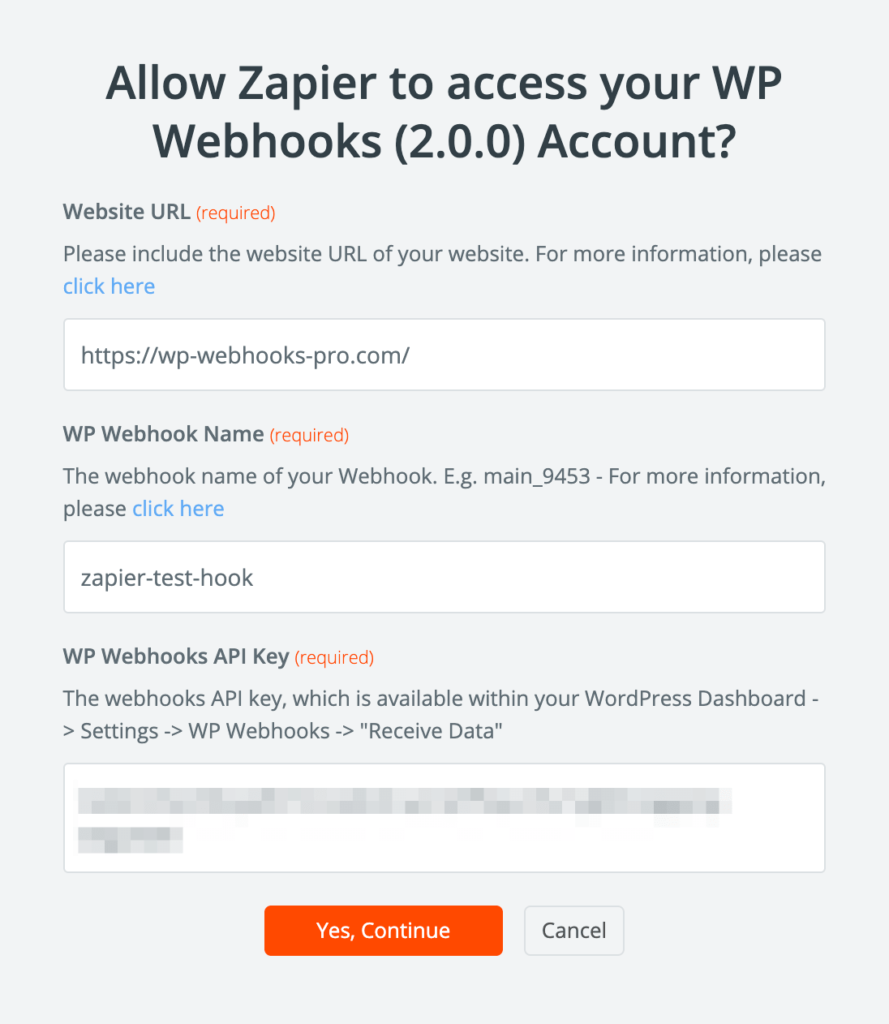
In the next step, you are prompted to choose an account. This is where you can set up your WP Webhooks webhook.
You will find your webhook settings in your WordPress dashboard within Settings -> WP Webbhooks -> Receive Data.
Zapier requires the following fields to authenticate your website correctly:
- WP Webhook URL
This should contain the URL of the website that you installed WP Webhooks on. E.g. https://yourdomain.com - WP Webhook API Key
- This is the unique token that makes sure your webhook is secure. Please do not share this token with anyone. You will find it within the “Receive Data” tab as seen in the screenshot below.
- WP Webhook Name
This is the name of the webhook URL within the “Receive Data” tab. Please see the screenshot down below.
After you successfully filled in your information, you need to click “Yes, continue” and Zapier automatically connects with your webhook URL. Here is a screenshot of how the filled form looks like:
In the last step, you can set up the webhook action as usual, but in a more simplistic interface than using the “Webhooks by Zapier” app from Zapier.
Please see as an example the screenshot down below:
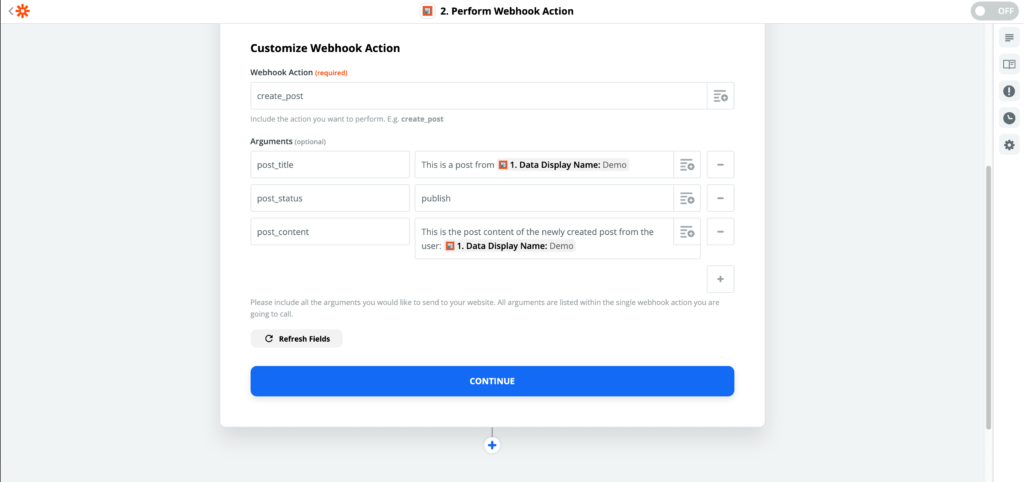
That’s it! After clicking continue, you can test the step and you are good to go.
The values from the response are as well optimized and visible in a more convenient way.
In case you would like to see any specific feature, you can request it here.
To access our Zapier extension you can click on the following link: https://wp-webhooks.com/visit/wp-webhooks-zapier