The logs feature allows you to get a better understanding on which actions, triggers, and flows tried to exchange data or send data in the first place.
It will track every incoming and outgoing data for WP Webhooks Pro, as well as every interaction of a Flow from the WP Webhooks Flows feature.
How to use the Logs feature
The log feature is available by default within your WordPress dashboard -> Settings -> WP Webhooks Pro -> Logs – There you will find a list including various logs of previously fired triggers and actions.

Within the list visible, we always display the latest 10 logs, sorted with the most recent one at the top.
To see further details about a specific log, simply click on the right at the three dots and select Details.
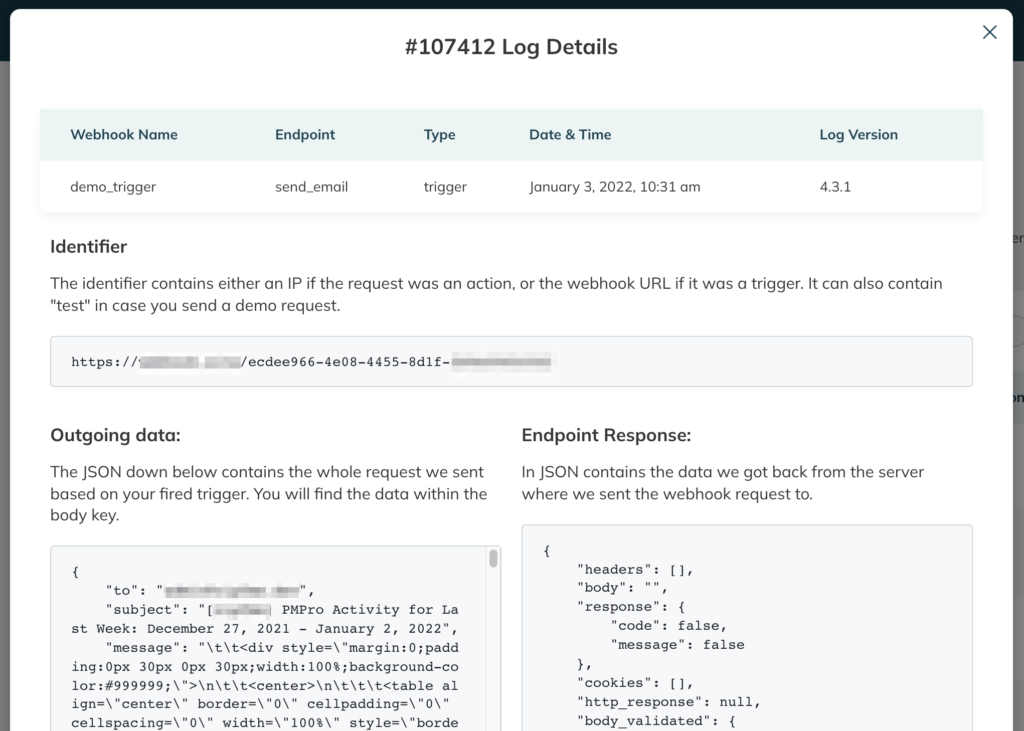
The details of the log show you everything related to the given request. Depending on the type of log, the visible data will differ to show you everything relevant to the specific activity.
How to navigate through the logs
There are two ways on how you can navigate through the logs:
- Naviate using the pagination
At the bottom of the log page, you will see a pagination that allows you to jump in between the pages to locate the log you are looking for. - Navigate using the offset search
Our offset search is a combination out of two input fields that work together to customize logs based on your needs. To use it, please refer to the possible values down below:
Nr. of Logs
This will refer to the number of logs displayed on the logs page. By default we display 10. If you would set it to 20, we would show the 20 most recent logs.
Offset
As the number of logs always displays the most recent ones, you can use the offset to display logs that are older than that.
As an example: Let’s assume you want to display 30 logs that are older than the last 100 ones. In this case, you would set the Nr. of Logs to 30 and the Offset to 100.
This will then ignore the latest 100 logs and shows you only the ones after them.
Automatically clean the logs
Since version 4.3.3, it is also possible to automatically clean the logs every 30 days. To activate this feature, please head over to WordPress dashboard -> Settings -> WP Webhooks Pro -> Settings, and activate the Auto-clean logs feature.
Once that’s done, we will check once per day for logs older than 30 days, and delete them automatically for you.
Use a custom cleaning interval
It is also possible to customize the cleaning interval in case you want to delete the log data for files older than 7 days, or 60 days, or whatever you like. To do so, please add the snippet below to your functions.php file and change the number 30 to your amount of days you want to keep the logs.
add_filter( 'wpwhpro/logs/clean_interval', 'wpwh_customize_clean_interval', 20, 1 );
function wpwh_customize_clean_interval( $interval ){
	return 30; //Change the number to the amount of days you want to keep the logs
}