As the name indicates, this part focuses on sending data within your WordPress website to an external webhook or API endpoint, once an event was triggered. This usually is the external service that is meant to receive the data from your WordPress website.
Note: It does not necessarily mean that a trigger endpoint has to be external since you can also connect it with endpoints of the same website.
Explained

Once you are on the Send Data tab, you will see a list of different endpoints that you can use to connect external endpoints to it (Within the sidebar)
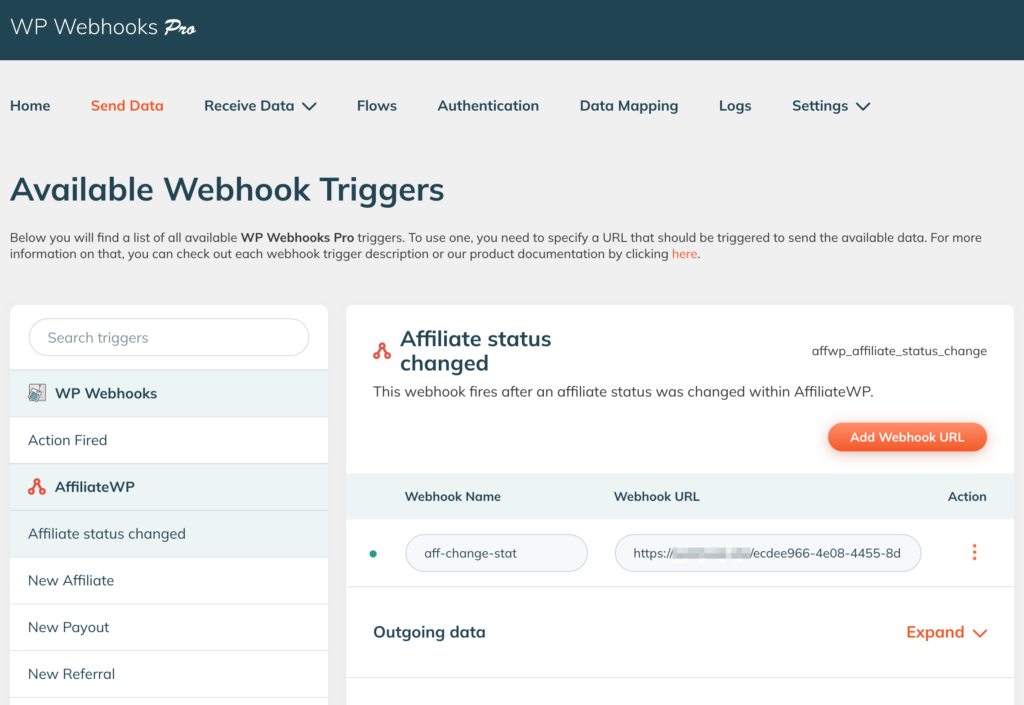
Once you clicked on an endpoint, you will see at the right further details about your selected trigger.
At the left of the details, you will see the label or name of the webhook and what it is about – a more detailed short description is directly below it.
The smaller text at the right is the technical indicator or shortcut of the trigger. It is used to handle the endpoint internally, as well as for giving indicators via the header that is sent with each of the triggered events or webhook calls.
On this view, you can manage all of your webhook URL’s that are fired once this endpoint is triggered. That means that, for example, once a post is created, all of the URLs you added there are triggered and the data related to that post is sent to them.
On the left (next to the Webhook Name), you will see a little dot that indicated whether the endpoint is active or inactive. By default, every added endpoint is active by default, unless you manually deactivate it within the “Action” settings at the right next to the “Webhook URL”.
The “Webhook Name” is the technical iddentifier of the added webhook and also send over within the event data once triggered.
The “Webhook URL” shows your added URL.
On the right side, you will find a button that shows further settings once clicked. Those settings are explained down below:
- On the first position, you will find the Delete button, which allows you to delete the webhook URL you previously added.
- The Deactivate link allows you to deactivate that specific webhook URL, which results in the URL not being triggered once the Send Data On New Post trigger (in this case) is sent.
- The Settings link opens a powerful popup that offers you further settings specific to this webhook trigger endpoint to send your data in a specific format, add an authentication template, data mapping (pro), and further features.
- With the Send Demo link, you can send some static data that is typically sent for this specific webhook trigger. This allows you to get a brief overview of how the data looks that arrives at the endpoint.
Please note: This is static data and does not represent the exact result of live data, so some fields will differ.
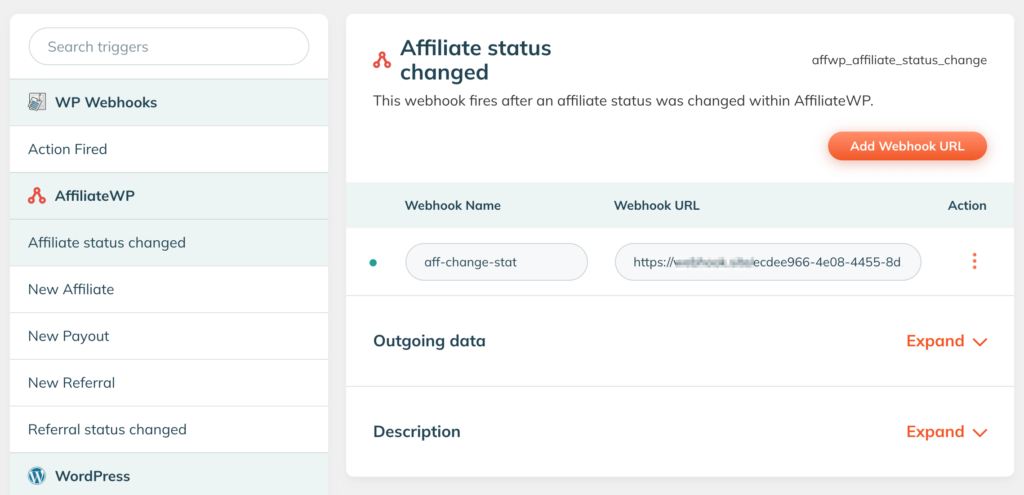
Beneath the webhook URLs, you will find two additional dropdowns (accordions), which offer you further help about the webhook trigger:
Outgoing values
The outgoing values accordion offers you further details about the data setup that we sent via the webhook trigger. The demo data there is usually represented by the demo data that we sent over via the Send Demo feature.
Description
The trigger description gives you a throughout and very detailed guide on how you exactly use this specific webhook trigger. It contains a step-by-step guide on how to set it up, when it is triggered, along with further tips on how to get the best results.