With the version 2.0 of WP Webhooks Pro, we introduced a feature called data mapping. It allows you to map certain values to a new structure within your data construct to make your response compliant with your own logic or the one of WP Webhooks.
We also offer a manual for advanced data mapping templates.
To give you a brief introduction, we defined two examples at the end of this article.
How to setup a data mapping template:
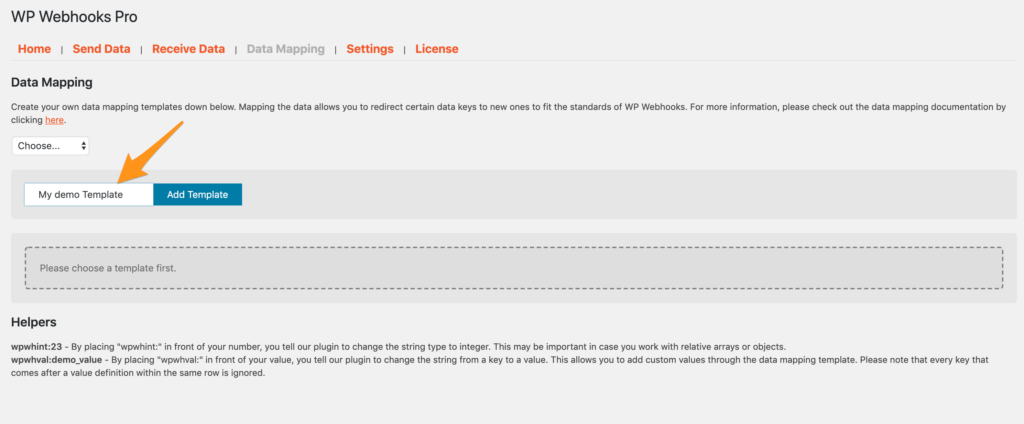
The first thing you have to do is to activate the data mapping feature.
To do that, please navigate to Settings > WP Webhooks Pro > Settings -> Activate Data Mapping, check the box and click “Save all”.

After the activation, you will see a new menu item. Please navigate there and create a template by adding the Name of it and click “Add template“
After that’s done as well, you can start setting up your mapping values.
Create a template for Data Triggers
In case you want to map the data that comes from your website to another webhook or service, this part of the manual is for you.
To get started, we assume we want to send a webhook trigger as soon as a post was deleted. The default data that will be sent (represented in that example as a json), looks as follows:
{
  "post_id": "12345"
}
and our goal is to make it look like that:
{
  "new_id": "12345",
  "username": "admin",
  "password": "mypassword"
}
To do so, we choose the data mapping template from the list and start adding the value mappings. In our case, the left value is the new value key and on the right, we can define the mapping value or the new value (or new array key for more complex setups, if you’d like to learn more about advanced setups, please click here).
In our example, that might look like that:
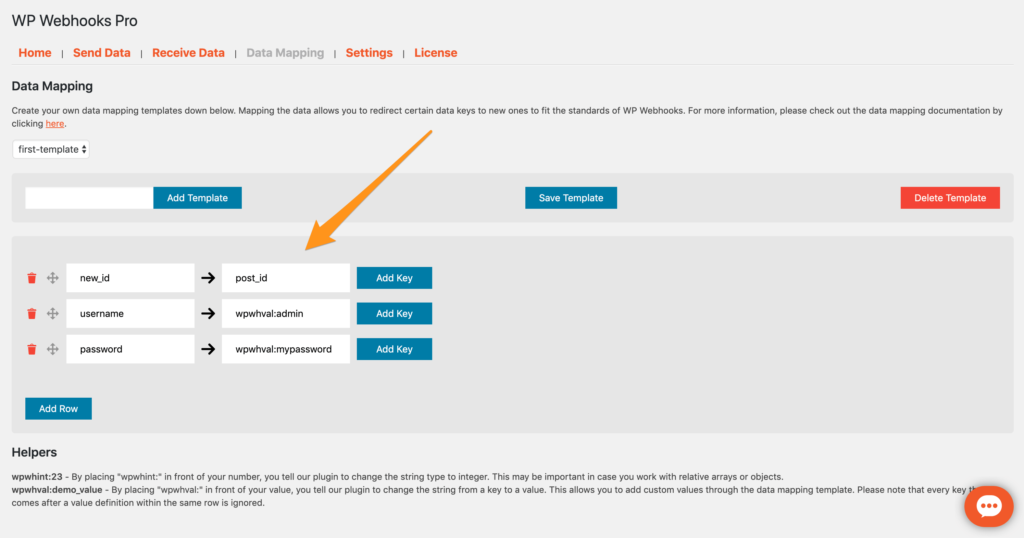
- For the first value, we define the new key at the left and the mapping key on the right. in our case, we tell the template to check for a key called “post_id“. If the key exists, it will map the value to it. If not, false will be returned for that value.
- The second and third row contains a different setup. In these, we define a new value to a new key. This works by typing a wpwhval: in front of the value.
Create a template for Data Actions
In case you want to map the data that comes to your website from another webhook or service, this part of the manual is for you.
To get started, we assume we want to receive a webhook action to delete a post on our site. The data you sent (represented in that example as a json), looks probably as follows:
{
  "ID": "1235"
}
Since WP Webhooks Pro has its own structure on how the data has to be received to make it work, this example would not work since the values wouldn’t be recognized by our plugin.
To fix that, we need to validate that incoming json to fit our structure. This can look like that:
{
  "action": "delete_post",
  "post_id": "1235"
}
To archive that, we are going to setup the new data mapping templated we created as follows:
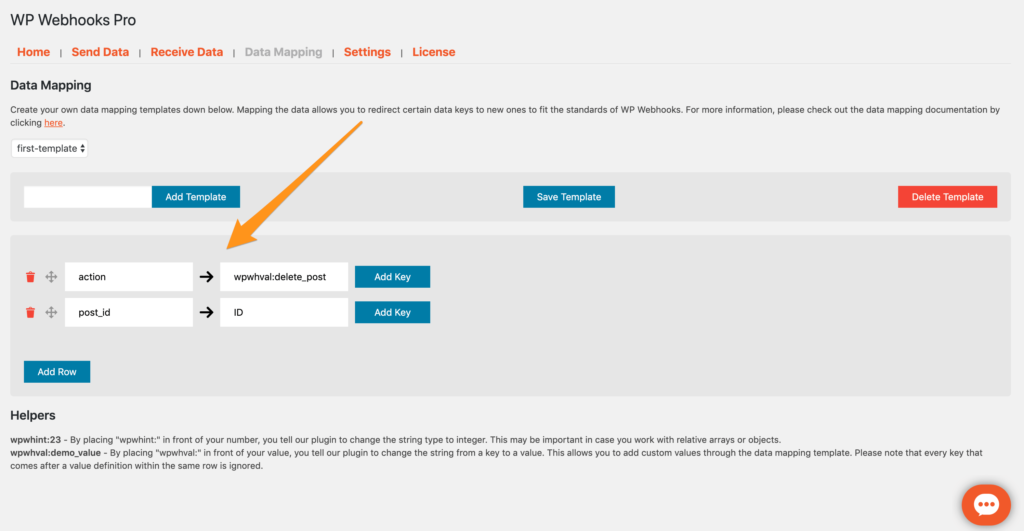
- The first value tells WP Webhooks Pro what kind fo webhook it is. On the left, we define therefore the new key and on the right site the new value. The new value is defined by a wpwhval: in front of it. Since we want to delete the post, we set it to “delete_post”.
- The second value is the mapping to the key that comes through the original json. at the left, we define the new key as our structure needs it and we map it to the original value (ID). In case the value ID is not found, the new key (post_id) will be created with “false” at a value.
- Once you added the values, you can use the Data Mapping Preview to make sure your data mapping works correctly.
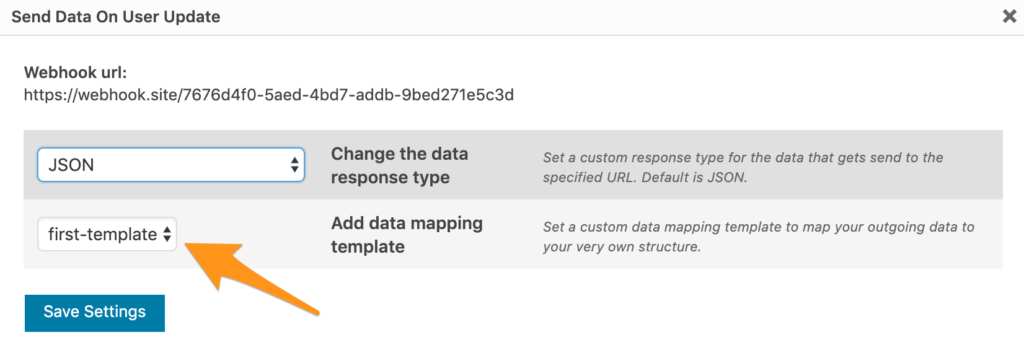
Connect the Template with a webhook.
To finally make it work, you need to connect the template you created with the specified trigger or action. To do so, simply head to the settings of the webhook and choose the data mapping template from the list.