Via our Flow feature, you can create fully dynamic automation workflows, directly on your WordPress website, just like via any other automation service.
Actions Explained

This tab is the counter-part to the Send Data feature. It allows you to receive Data from external API’s and services and process them within your WordPress website. To make that happen, this feature offers you one or multiple webhook URLs that you can integrate into other services to make them exchange data with your very own website.
Here is a screenshot of how this feature looks.
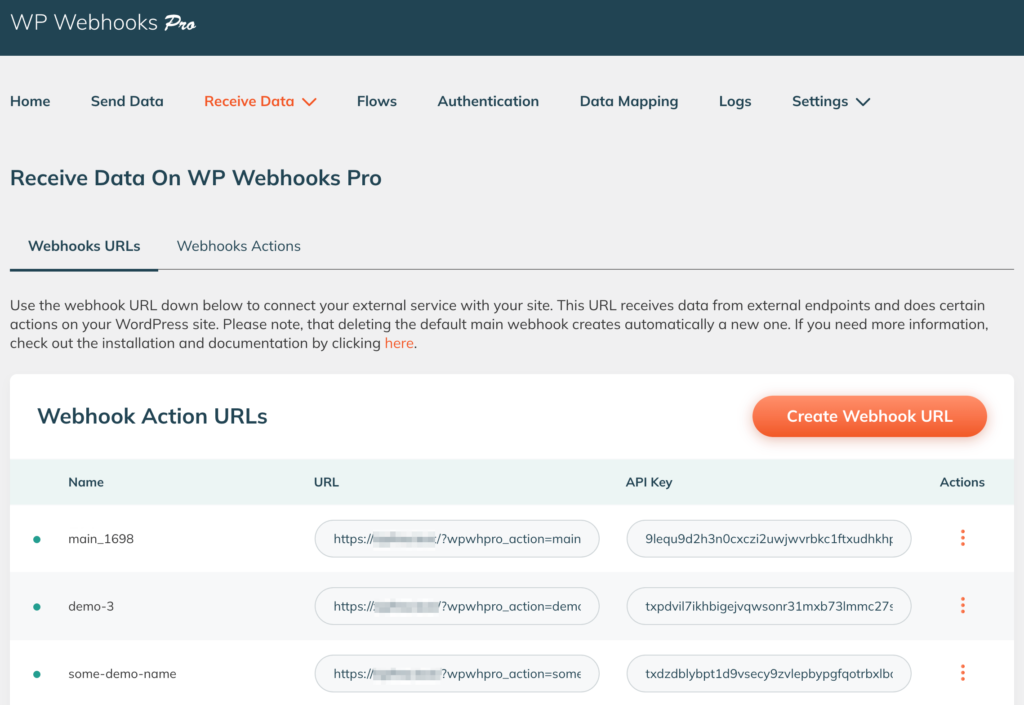
Similar to the Send Data tab, you will see a list of URL’s, just that in this case they are provided by our plugin. By default, there is always a single webhook URL available. Each of the available URLs is able to connect with every of the available webhook actions.
Each of the webhook URLs has two indicators. The first one is called Webhook Name and allows you to indicate what you want to use this webhook URL for. This value is used internally to give a bit of extra security to your webhook url since it has to match with the given API key, as well as it counts as an internal identifier of the webhook URL.
The second indicator is the Webbhook API Key, which acts as your security token to only allow you to use the features of WP Webhooks. That mentioned, please do never share your webhook URL with unauthorized people.
The Webhook URL fields simply combines both of the indicators and provides you with a fully functional webhook URL that you can add to your external services to exchange data.
On the right side, you will find some further actions that are related to each of the webhook URLs:
- On the first position, you will find the Delete button, which allows you to delete the webhook URL you previously added.
- The Deactivate link allows you to deactivate that specific webhook URL, which results in the URL not being accessible from the outside once an external service tries to send data over (The webhook still works, but it disables access and throws an Error as a response).
- The Settings link opens a powerful popup that offers you further settings specific to this webhook action, such as data mapping (pro), access tokens (pro), specific endpoint permissions (pro), and more.
After clicking on the Webhook Actions tab, you will find all available and active webhook actions.
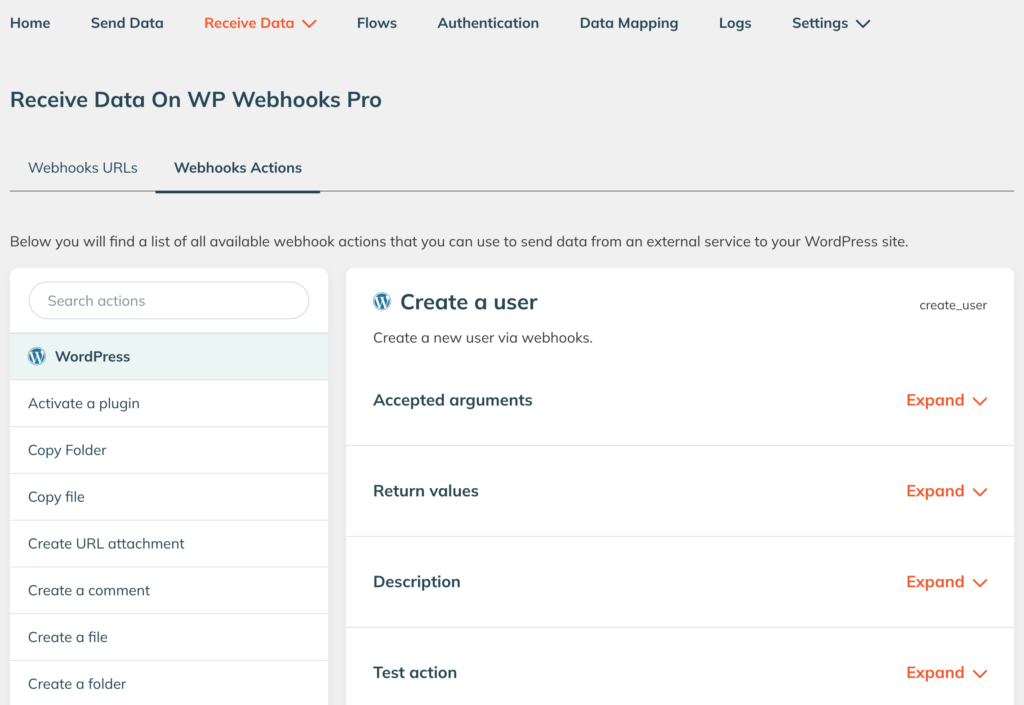
Once you selected an action from the left, you can see its details on the right. Down below you will find further details about each of the dropdown fields-
Accepted Arguments
This dropdown (accordion) shows you all available arguments that are available for this specific webhook action.
What is an argument?
What we call an argument is usually the key on the first layer of the JSON, XML, or form data of your request data.
Next to some of the arguments, you will find a little link called “Details” – Once you click it, a popup will appear with further information on how to use this argument. There, you will find a more specific manual for the arguments in case necessary.
To show that more visible, we added some examples down below:
Argument definition within Zapier
Within Zapier, Integromat and other third-party automation services, you can usually define a field within the split text field. At the left, you place the argument name and at the right the value you would like to use.

Argument definition as JSON
In case you are going to send a JSON instead of some form values as seen above, your arguments would be the keys on the first layer:
{
  "argument": "value",
  "argument_1": "value 1",
  "argument_2": "value 2"
}
Argument definition as XML
If you are using XML, the arguments are the first layer of the XML element:
    value 1
    value 2
    value 3
This setup is valid for every webook-ready service and you can follow that setup using the arguments wherever you want.
Return Values
Once an external service sends over data to your website, our plugin is going to send back an answer including further data which the external service can use to do further actions based on it. This button (accordion) shows you exactly how this kind of data looks like and what values are set.
Description
This tab contains a fully optimized description of how this specific webhook endpoint works. It offers you a step-by-step guide on setting up this specific webhook action, as well as some tips.
Test action
In case you want to directly test a webhook URL with a specific webhook action, you will find the possibility right within the Test action tab. Once you click on it, you will see a dropdown field from which you can choose the webhook URL you want to use to test the action.
Once you have chosen one, multiple fields appear which represent the available arguments of this specific webhook action. Simply fill in the values and press the Test action button at the bottom of the form.
How arguments are defined by third-party services
The arguments are the settings that your external service can use to do certain actions based on the webhook action that is used. If your external service send over the user email within the user_email argument, it will be identified as the user email.
This allows us to do certain actions using the external data within your WordPress system.
Note: In case you do not have control over the format that the external service uses to send over the data, you can use either a third-party service like Integromat or you can also use our own Data Mapping engine that comes with our Pro version.