How to update custom post meta values with WP Webhooks

Updating post meta values can be tiresome, especially if you are not sure how the meta values are used and saved by your used plugins.
This guide gives you a full explanation of how to identify meta values, where to find them, and how to update them via WP Webhooks.
Please note: This manual focuses on updating meta and ACF values. If you want to learn on how to create or update a post in the first place, please see the following Manual: How to create a post for a custom post type
What is a meta value?
When using WordPress in combination with other plugins, you most likely have seen extra fields that you can configure for your posts (E.g. Advanced Custom Fields, Yoast SEO meta values, Woocommerce Product details, and Orders details).
Those values allow the plugins to save extra data for a specific post (or custom post), which is done via custom meta values.
Where are meta values stored and how can I view them?
Meta values are stored within a custom table called wp_postmeta inside of your database (Please note that the wp_ depends on the prefix that you chose while setting up WordPress). This table was generated automatically by WordPress and might look something like this:
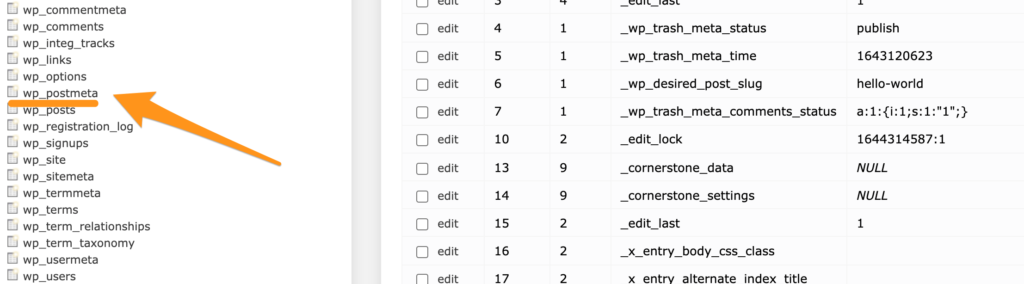
While, by default, meta values are only indirectly visible within your WordPress site (Whenever a plugin displays them for you), you can see all of them directly within your database.
Here are two ways you can use to view the meta values
- Via a third-party plugin
The easiest way to view your meta values visually is via a third-party plugin such as JSM’s Show Post Metadata. This plugin will display the meta values for a given post directly within the post itself. - Diectly via your database
Depending on your server host, you will be able to view the meta values directly within your database table. The meta values are related to the post via the post ID. Here is an example SQL statement that you can use to fetch all meta values for a given post:
SELECT * FROM wp_postmeta WHERE post_id = 12345
(Please make sure to change wp_ to the prefix of your table, as well as 12345 to the post ID you want to see the meta values for.)
How to create and update meta values with WP Webhooks
Once you located your meta values, you can prepare those to be dynamically created and updated via the create_post and update_post webhook actions (Both actions support creating and updating meta values).
To make it work, you need to define the manage_meta_data argument within your request, along with a JSON formatted string containing the meta values you would like to update. (The examples below will update the meta values or create them in case they don’t exist yet).
If you would like to read more in-depth information on the full functionality of the manage_meta_data argument, please take a look at the argument via the create_post and update_post webhook actions (You will find further details of the argument by clicking on the title within the argument list).
Using the manage_meta_data value generator
To make your start with updating or adding meta values as easy as possible, we created a generator that will help you to automatically create a JSON formatted string for you. Here’s how it works:
- Click on “Add meta data”
- On the left, please add the meta key name of the meta key from your postmeta table
- On the right, please add the value for the meta data
(Please note: You can also provide serialized data as a value. If you would like to add an array, please visit the manual for a custom JSON construct down below) - Once you are ready, please click on generate_meta_data value button and copy the result from the text field below into the value field of the manage_meta_data argument of your chosen webhook action.
Using a custom JSON formatted string
In case you prefer to create the JSON value by yourself, you can do that in multiple ways. Down below, we describe our preferred way of updating meta values using the manage_meta_data argument.
- Add the manage_meta_data argument to your webhook request
- To create the value, we recommend using the JSON Editor Online: https://jsoneditoronline.org/ as it allows you to visually edit the JSON construct.
- To get started, please copy the following template to your preferred editor (In our case to JSON Editor Online):
{
     "update_post_meta":[
       {
        "meta_key": "first_custom_key",
        "meta_value": "Some custom value"
       },
       {
        "meta_key": "second_custom_key",
        "meta_value": {
          "first_key": "The first array value",
          "second_key": "The second array value"
        }
       }
     ]
} - Once copied, you can adjust and add the meta values as you require those. Within the example, we add two meta keys along with values:
Meta key: fist_custom_key
Meta value: Some custom Value
Meta key: second_custom_key
Meta value: An array containing two array items (first_key, second_key) - After you set up your values, simply paste the JSON as a value into the manage_meta_data argument.
Some important notes and tips:
- If you want to use line breaks within meta values, please make sure you encode them as linebreaks will break the JSON, resulting in no values being added to your meta data. To encode a line break, simply replace it by \n
- Similar as for the line breaks, you also need to encode double quotes. To do that, simply add a backslash in front of them: E.g. This is a “demo” value need to be turned into This is a \”demo\” value
If you would like to read more in-depth information on the full functionality of the manage_meta_data argument, please take a look at the argument via the create_post and update_post webhook actions (You will find further details of the argument by clicking on the title within the argument list)
Create and update meta values from the Advanced Custom Fields plugin
By default, we also support custom ACF values for the Advanced Custom Fields plugin. Down below, we will show you two ways how you can integrate those ACF meta values with WP Webhooks (The examples will update the ACF fields or create them if they don’t exist yet).
If you would like to read more in-depth information on the full functionality of the manage_acf_data argument, please take a look at the argument via the create_post and update_post webhook actions (You will find further details of the argument by clicking on the title within the argument list)
Using the manage_acf_data value generator
To make your start with updating or adding meta values as easy as possible, we created a generator that will help you to automatically create a JSON formatted string for you. Here’s how it works:
- Click on “Add ACF data”
- On the left, please add the field name for your ACF meta field
- On the right, please add the value for the meta data
(Please note: You can also provide serialized data as a value. If you would like to add an array, please visit the manual for a custom JSON construct down below) - Once you are ready, please click on generate_acf_data value button and copy the result from the text field below into the value field of the manage_acf_data argument of your chosen webhook action.
Using a custom JSON formatted string
In case you prefer to create the JSON value for the manage_acf_data argument by yourself, you can do that in multiple ways. Down below, we describe our preferred way of updating meta values using the manage_acf_data argument.
- Add the argument to your webhook request
- To create the value, we recommend using the JSON Editor Online: https://jsoneditoronline.org/ as it allows you to visually edit the JSON construct.
- To get started, please copy the following template to your preferred editor (In our case to JSON Editor Online):
{
      "update_feld":[
        {
          "selector": "first_custom_key",
          "value": "Some custom value"
        },
        {
          "selector": "second_custom_key",
          "value": { "some_array_key": "Some array Value" }
        }
       ]
} - Once copied, you can adjust and add the acf values as you require those. Within the example, we add two meta keys along with values:
Meta key: fist_custom_key
Meta value: Some custom value
Meta key: second_custom_key
Meta value: An array containing one array item (some_arrray_key) - After you set up your values, simply paste the JSON as a value into the manage_acf_data argument.
Some important notes and tips:
- If you want to use line breaks within meta values, please make sure you encode them as linebreaks will break the JSON, resulting in no values being added to your acf data. To encode a line break, simply replace it by \n
- Similar as for the line breaks, you also need to encode double quotes. To do that, simply add a backslash in front of them: E.g. This is a “demo” value need to be turned into This is a \”demo\” value
If you would like to read more in-depth information on the full functionality of the manage_acf_data argument, please take a look at the argument via the create_post and update_post webhook actions (You will find further details of the argument by clicking on the title within the argument list)
Sign up for WP Webhooks news
Get the latest features, tutorials and promotions directly into your inbox.